2 Color Poster Project
~ 2 COLOR POSTER PROJECT ~
Project Sheet PDF
Competency:
#503 Demonstrate basic use of page layout software - InDesign
Project:
Utilizing Cornell Notes with class lecture & demonstration of Adobe InDesign, the student will first create 2 abstract designs showing their use of each tool reviewed. Next the student will reproduce the fundraiser poster provided to them with concern for accuracy in both typography & measurement. Lastly the student will creatively design their own SkillsUSA poster as a Live Job to include all of the content provided, all to the criteria detailed in the PDF.
Key Points & MAX Strategy:
Utilizing "Cornell Notes" as a comprehension strategy, we will use Class Lecture, demo, & hands on activities for SkillsUSA poster as a Live Job
-
Selection Tool
-
Direct Select Tool
-
Type Tool & Text on a Path
-
Line Tool
-
Pencil Tool
-
Pen Tool
-
Rectangle, Elipse Frame & Polygon Frame Tool
-
Rectangle, Elipse & Polygon Shape Tool
-
Color Palette
-
Character Palette
-
Stroke Palette

Still Life




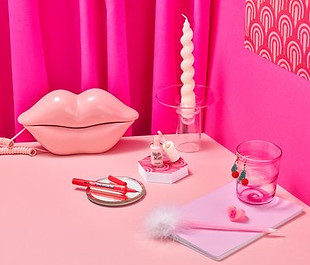
Still Life - 1st Photo Studio assignment
Wikipedia defines still life photography as 'a genre of photography used for the depiction of inanimate subject matter, typically a small group of objects.' You will be using items from home, so find a way to make your photo interesting. Think about the composition and arrangement of your items, what story you are telling, use interesting lighting or backgrounds!
Remember to make a still life you need a variety of items, and think about size as well as backgrounds!
Seniors: You will be doing Self-Portrait still-lifes - you will need props that are all about you, from birth to now
Year One students: You will be doing hobby still-lifes - props can be anything and everything school-appropriate for/form your hobbies
Required to take a minimum of 20 photos (but no more than 40) with 3 distinct angles -see below
Due on Teams -
-
Contact Sheet with correct captions for Studio
-
Title
-
Shutter Speed
-
Aperture
-
Focal Length
-
ISO
-
-
3 Final Enlargements that must be from the following three angles:
-
Traditional, eye-level angle
-
Birds-eye view
-
Unique angle or crop of your choice
-

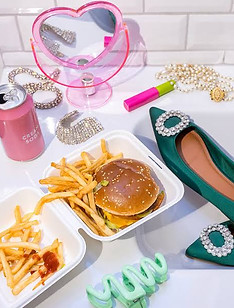

Layflat photography:
Is defined as a style where objects are arranged on a flat surface and photographed from directly above.

You will need to take SOME photos using this style for your still-lifes!
You may find this easier to put your backdrop directly on the floor, instead of up in your product studio.
Exploring Unique Camera Angles:
Low-Angle and Extreme Low-Angle: Move your camera below eye level—or place it right on the ground—and point it upward. This makes subjects look taller, stronger, or larger than life, and turns ordinary buildings into soaring, pyramid-like shapes.
High-Angle and Bird’s-Eye View: Stand above your subject or shoot straight down from overhead. This perspective highlights flat layouts, geometric patterns, shapes, and colors.
Dutch Angle: Tilt the camera slightly on its roll axis (around 15 to 45 degrees) to inject a sense of motion, energy, or tension into urban scenes and action shots.
Art of the Crop:
Shoot Wider Than Needed: Frame your shot slightly wider than your final vision. This gives you "breathing room" and uses negative space.
Aggressive and Creative Crops: Break free from standard rules of thirds once you master them. Crop tightly into a portrait—such as focusing entirely on a single eye—to create an intimate, abstract mood from a standard wide shot.
Use Foreground Frames: Get close to ground elements like flowers or rocks with a wide-angle lens, filling the bottom of your frame to add instant depth before cropping the final boundaries.